
jest单元测试学习
安装
初始化一个项目:yarn inityarn add jest
插件 vscode jest 的 snippet
Jest 用于直接检测(自动 run 脚本)
测试加法函数
新建 src 编写一个 math.js
1 | const sum = (a, b) => a + b; |
在同目录下编写math.jest.js
一个测试文件组成
- 引入的测试 js
- 模块函数 describe
a. 包含了 test 函数,和 given when then
1 | const { sum } = require("./math"); |
编写脚本 packgejson
1 | { |
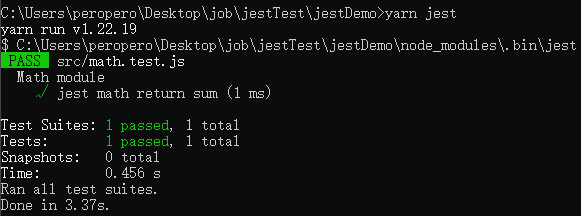
跑脚本
1 | yarn jest |
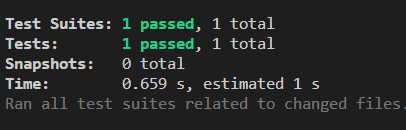
成功状态
把 equal 改成 1 测试失败状态
失败状态
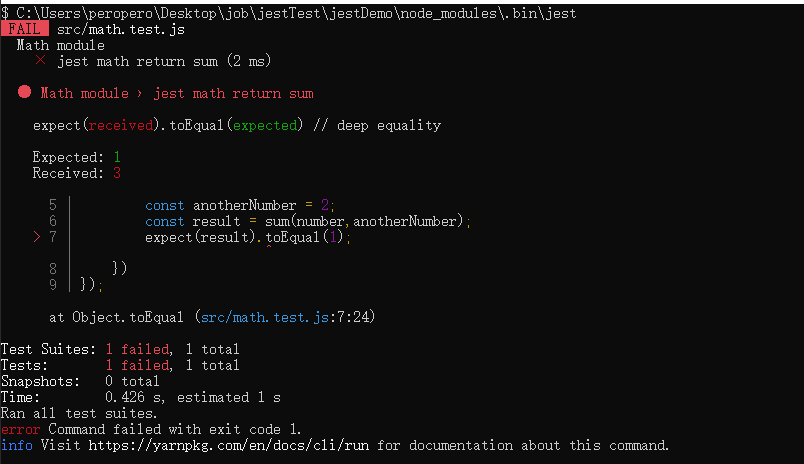
看这个报错也可以知道是 toEqual 的报错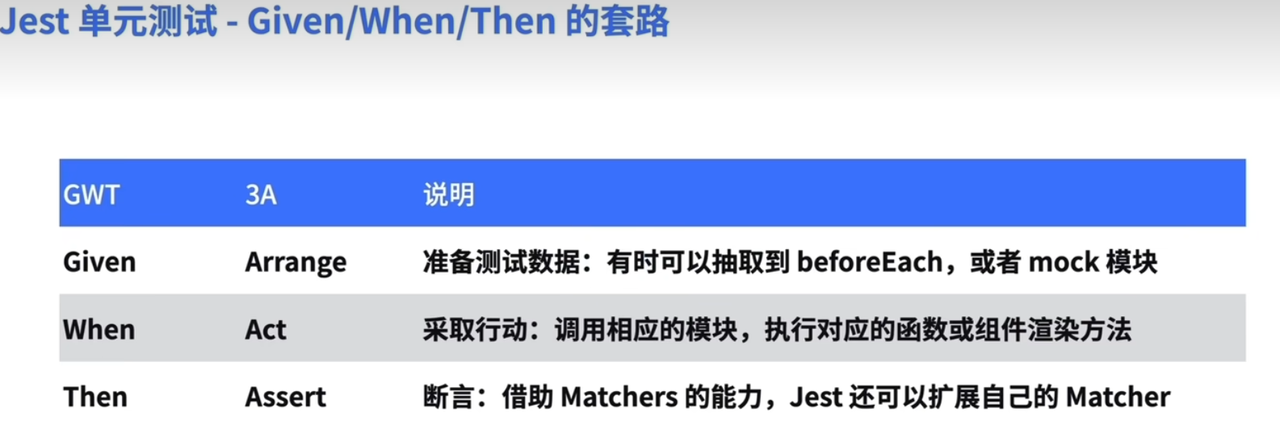
toBe 和 toEqual
toBe 相当于=== 缺点 不能判断引用类型
toEqual 则是完全相对 包括引用类型里面的值也要相等
编写demo.test.js
1 | // 测试toBe和toEqual |
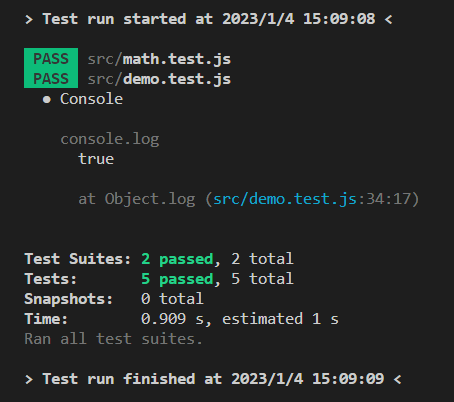
run 脚本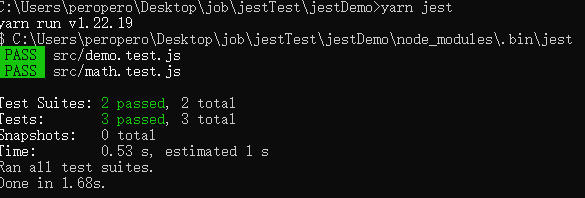
模块间依赖
依赖分为两种类型:
社交型测试单元和独立型测试单元
当一个模块需要依赖其他模块来实现他的功能的时候,他就是一个社交型单元
当一个模块不需要依赖其他模块就能实现自己的功能的时候 就是一个独立型单元
Mock stub 和 spy
mock 用于替代某个模块
stub 意为打桩 用于模拟特定的行为
代码例子
第一个 test 创建了一个jestfn 虽然里面没有写东西但是代表他已经是一个函数 toHaveBeenCalled代表他是否被调用
第二个 test 创建了个返回值永远为true的jestfn, 调用返回了true
1 | // stub用于模拟特定行为 |
spy 用于监听模块的行为
单元模块的易测性
我们编写测试代码的时候,相互间依赖的模块应该以最简单的形式展现出来,而我们的 mock 作用是代替某个模块,如果我们 mock 次数多了就要考虑这个模块的独立性了
所以在保持模块独立性的同时,也是促使自己去思考什么样的模块符合职责单一原则
代码的易测性也代表着代码的可维护性
实现一个查找名称的方法并测试
新建一个 searchName.js
1 | import * as services from "./service"; // 这个是后端代码 可以暂时不写 |
此时运行
发现他不支持 esm 所以我们需要借助 babel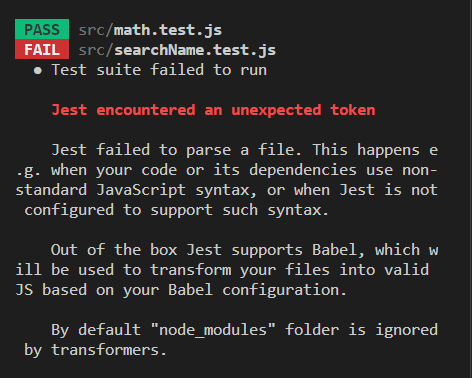
https://jestjs.io/docs/getting-started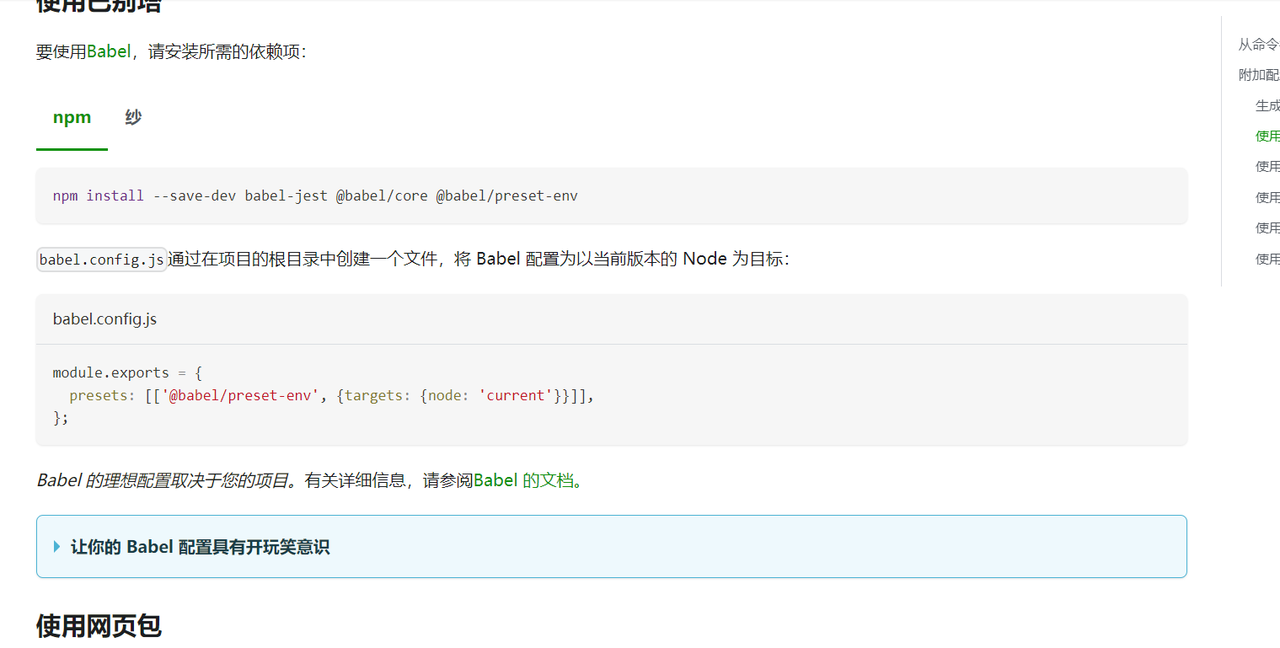
操作完成后就可以执行了
借助于 jest mock
其实我们做测试的时候并不关心传过来的数据,而是想测试这个函数的功能是否健壮
那么我们就可以利用 jest 的 mock 去取代这个模块 注意不要写desrcribe
1 | import searchNames from "./searchName"; |
此时就可以跑通上述两个测试
mockImplementation 单独模拟
如果我们想对单个测试使用单独的 mock,那么可以写拦截方法.mockImplementation
这个方法可以单独模拟
1 | import searchNames from "./searchName"; |
不过此时抛出一个疑问 为什么没有提示
为了保证测试的完整性和简单性 我们应该重复的去使用他 也就是说测试里面不应该有任何逻辑
toHaveLength 判断长度
补充两个测试 并学习 toHaveLength 的用法
1 | test("should not return more than 3 matches", () => { |
测试帮助我们快速重构代码
如果我们想实现输出的结果对于输入的大小写不敏感 那么测试用例应该是如下编写 此时是跑不通的 所以我们去重构代码
1 | test("should return search result is not case sensitive", () => { |
1 | // 如果数据大于三个返回三个 小于三个直接返回 |
总结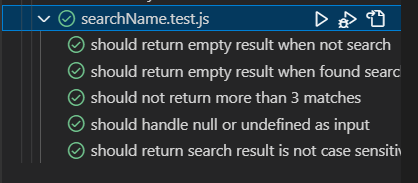
我们可以通过 vscode 看到每个单元测试,让我们能够快速回顾逻辑,并且他们都是可以自动化运行的,避免在我们今后改动了某些实现导致测试失败
jest 的 watch 模式
注意该功能需要git init
监视者模式yarn jest --watch
有多个辅助命令
1 |
|
jest 的 coverage
命令:yarn jest --coverage
Jest coverage 我们可以看到有多少语句是被测试过的,有多少分支是被测试过的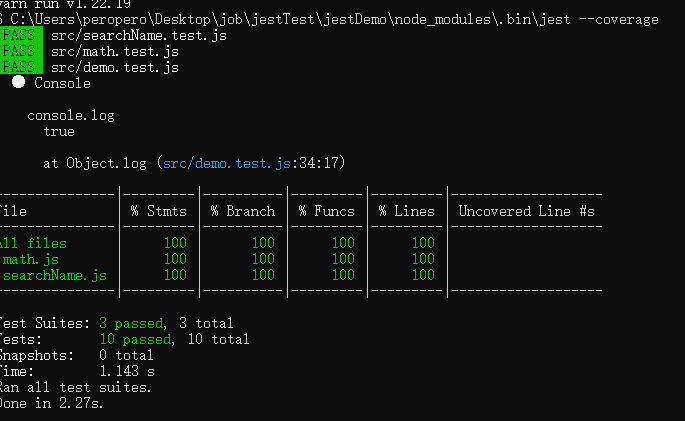
然后他会在根目录生成一个文件夹 coverage
里面的 html 可以打开看此次的测试报告
快照系统
jest 提供了一个快照方法能够直接打印出对应的结果
1 | export const sayHelloToName = (name) => { |
测试原则
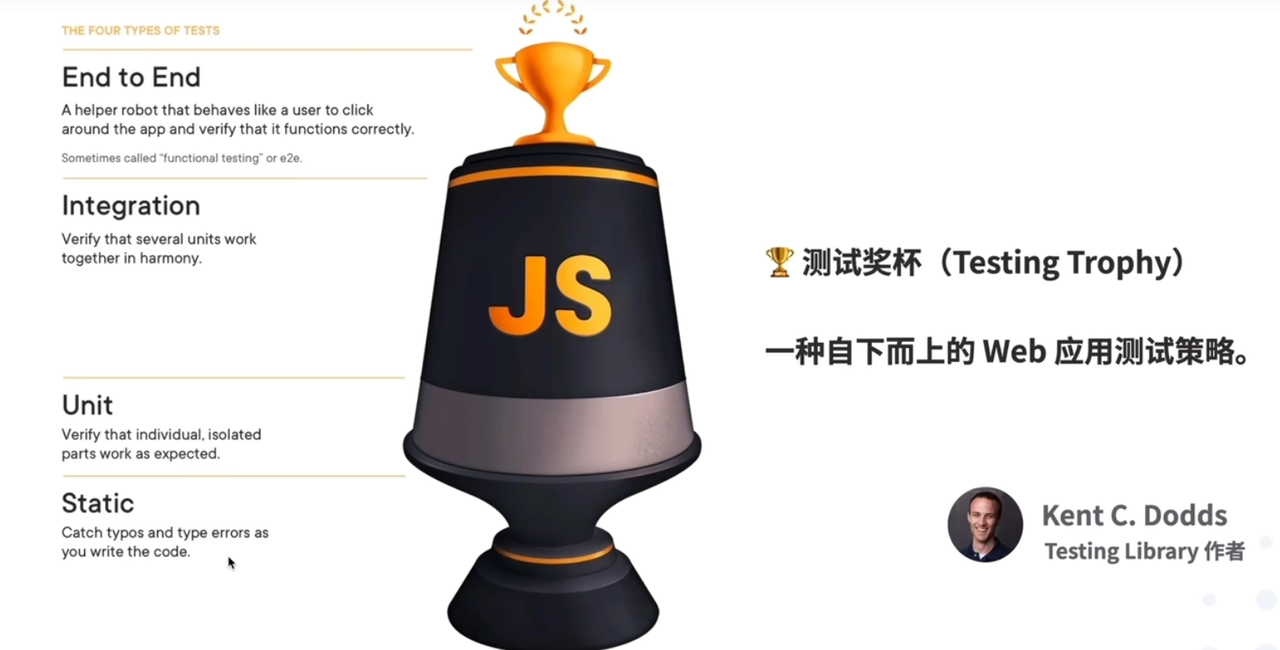
分为端到端测试(模拟用户行为)集成测试(验证多个单元能否协调工作)单元测试,静态检查(ts eslint)
组件化测试
安装项目yarn create react-app fed-testing-react --template typescript
执行测试yarn test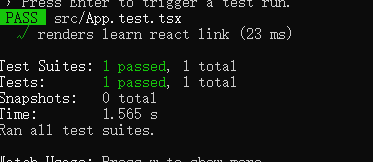
观察一下他的测试代码 也是非常经典的 given when then
1 | import React from "react"; |
传递了两个函数 一个是render 用于渲染组件,screen 用于获取对应的组件元素 这里是在 app 里面通过文本的方式找到了这个 a 标签
然后 toBeInTheDocument 就可以验证这个元素是否在 document 中
编写一个输入框,查看输入的内容是否显示在对应的标签中并测试
稍微修改一下我们的 app.tsx
1 | import React, { useState } from "react"; |
运行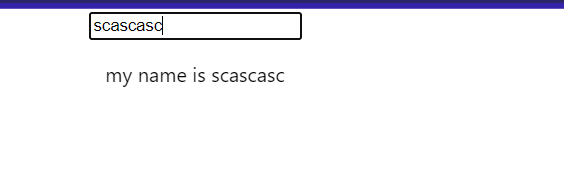
可以操作
接下来修改我们的测试代码 我们发现我们需要找到输入框,那么我们可以通过找输入框一开始的 placeHolder 去查找到该输入框
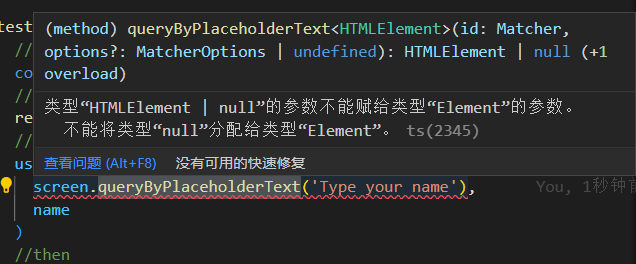
这里介绍一下两个 api
getByPlaceholderText找到输入框的placeHolder找不到返回nullqueryByPlaceholderText同理 但 ts 会报错
因为我们需要确定一定能找到 所以一般用的是前者
然后我们需要找到输入的 name 是否在页面中 则要用到 getByText
1 | import React from "react"; |
运行成功 成功测试组件
TODO 组件测试
代码仓库:https://github.com/JimmyLv/fed-testing-react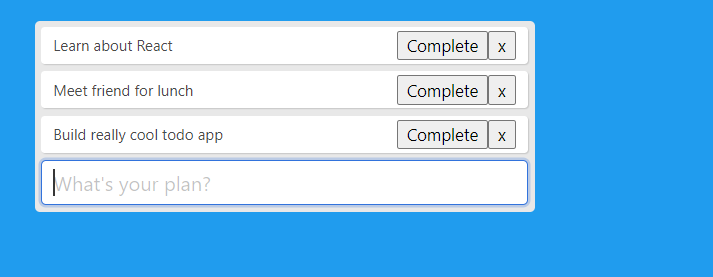
首先这个 todo 组件有三个默认的事件,而且我们可以对他进行增删改,现在我们要对他的功能进行测试
然后在对应的 Todo.tsx 目录下面新建 Todo.test.tsx
我们了解到这个 todo 能分别进行以下的事情
- 渲染新的
todo - 点击
complete按钮执行toggleTodo - 点击
Redo按钮执行toggleTodo - 点击
x按钮执行removeTodo
所以我们要针对这几个交互事件去做单测
渲染新的 item
我们在输入框输入事件之后回车会生成新的 todo 现在我们要开始测试这一项
首先观察组件传递新 todo 的方式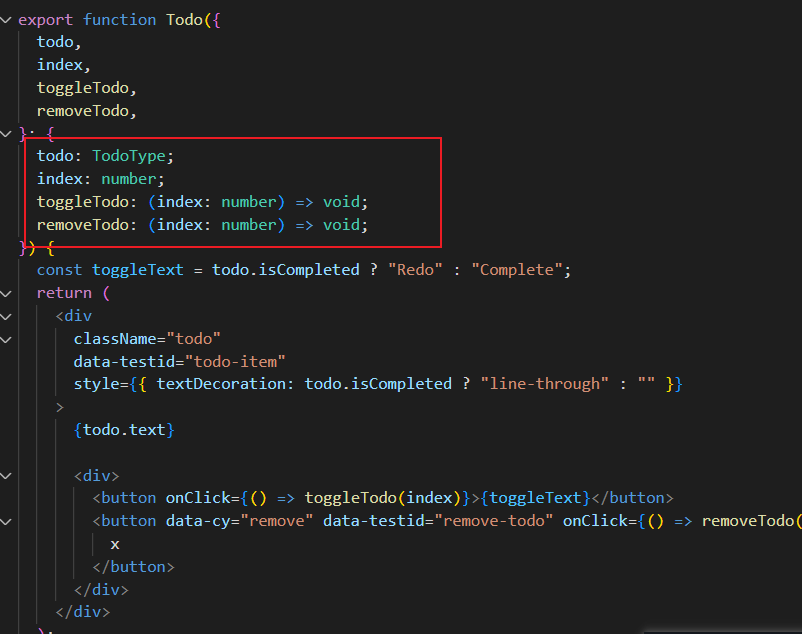
我们发现他是通过 prop 传递了 todo 事件 index 和两个 function 进去的
所以我们对应也要创建新的 todo 给他送进去 对于 function 我们可以用 jest.fn()去暂时隔离 那么代码就是
1 | import { render,screen } from "@testing-library/react"; |
那么这个单侧就能通过了
test.todo
我们写完整的测试代码之前可能要经历一个类似于 todo 的过程,那么其实 jest 也是有提供类似的代码的
1 | test.todo("should render completed item"); |
编写好之后,会发现他实际上是不会跑的,就相当于一个注释放在那里用于后续的测试流程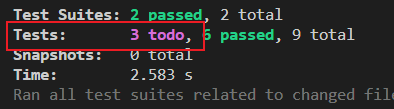
渲染完成状态
1 | test("should render completed item", () => { |
是否调用了 toggleTodo
- 对于已完成的事件 点击 Redo
1 | test("should toggle item", () => { |
- 对于未完成的事件 点击 Complete
1 | test("should toggle item when todo not completed", () => { |
是否调用了 deleteTodo
1 | test("should delete item", () => { |
检验测试覆盖率
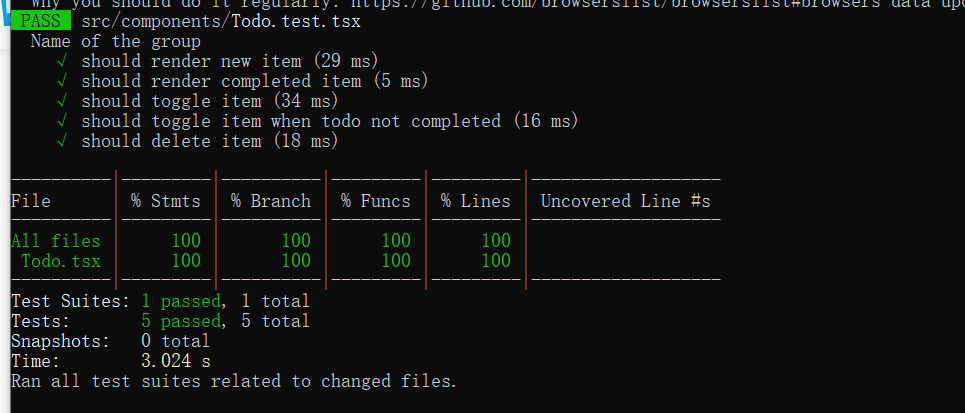
Todo Form 组件测试
1 | import React, { useState } from "react"; |
观察这段组件代码 我们可以知道 form 组件做了以下几件事情
- 输入值之后 执行
addTodo和setValue - 输入空值 不执行
addTodo输入值后执行
addTodo1
2
3
4
5
6
7
8
9
10
11
12
13test("should allow add todo when not empty input", () => {
//given
const addTodo = jest.fn();
render(<TodoForm addTodo={addTodo} />);
//when
// 模拟回车输入值
userEvent.type(screen.getByPlaceholderText("What's your plan?"), "do sth{enter}");
//then
//这里写 toBeCalledWith 是代表 addTodo 这个函数是否被 do sth 这个参数调用
expect(addTodo).toBeCalledWith('do sth');
});输入空值不执行 addTodo
1
2
3
4
5
6
7
8
9
10
11
12test("should ignore empty input", () => {
//given
const addTodo = jest.fn();
render(<TodoForm addTodo={addTodo} />);
//when
// 模拟回车输入空值 用花括号标识回车
userEvent.type(screen.getByPlaceholderText("What's your plan?"), "{enter}");
//then
// 这里要写 toBeCalled 不能写 toHaveBeenCalled 因为后者需要传递大于 0 的整数
expect(addTodo).not.toBeCalled();
});
app 组件测试
观察一下 app 组件的代码
1
2
3
4
5
6
7
8
9
10
11
12
13
14
15
16
17
18
19
20
21
22
23
24
25
26
27
28
29
30
31
32
33
34
35
36
37
38
39
40
41
42
43
44
45
46
47
48
49
50
51
52
53
54
55
56
57
58
59
60
import React, { useState } from "react";
import "./App.css";
import { Todo } from "./components/Todo";
import { TodoForm } from "./components/TodoForm";
import { TodoType } from './types'
import { toggleOneTodo } from "./utils/toggleOneTodo";
function App() {
const [todos, setTodos] = useState<TodoType[]>([
{
text: "Learn about React",
isCompleted: false,
},
{
text: "Meet friend for lunch",
isCompleted: false,
},
{
text: "Build really cool todo app",
isCompleted: false,
},
]);
const addTodo = (text: string) => {
const newTodos = [...todos, { text }];
setTodos(newTodos);
};
const toggleTodo = (index: number) => {
const newTodos = toggleOneTodo(todos, index);
setTodos(newTodos);
};
const removeTodo = (index: number) => {
const newTodos = [...todos];
newTodos.splice(index, 1);
setTodos(newTodos);
};
return (
<div className="app">
<div className="todo-list">
{todos.map((todo, index) => (
<Todo
key={index}
index={index}
todo={todo}
toggleTodo={toggleTodo}
removeTodo={removeTodo}
/>
))}
<TodoForm addTodo={addTodo} />
</div>
</div>
);
}
export default App;
他做了以下几件事情
- 渲染了三个 todo list
- 执行
addTodo会添加一个item - 执行
removeTodo会删除一个item - 执行
toggleTodo会切换todo的状态渲染三个 todo(
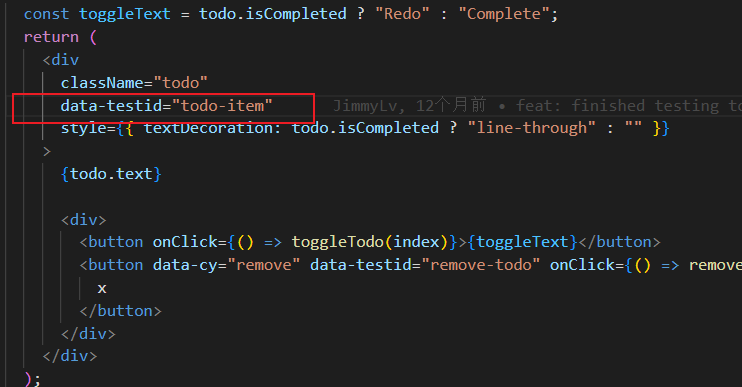
我们在这里会发现没办法借助什么标识符去知道我们到底渲染了多少个初始 todogetAllByTestId的使用)
那么回去 todo 组件查看 发现写了一个data-testid
那么就可以借助这个id来看目前渲染的 item 数目1
2
3
4
5
6
7
8test('should render todo-list',()=>{
//given
render(<App/>)
//when
const todos = screen.getAllByTestId("todo-item");
//then
expect(todos).toHaveLength(3);
});检测 add Todo
1
2
3
4
5
6
7
8
9
10
11
12
13
14
15test("should add todo", () => {
//given
render(<App />);
//when
// 模拟用户输入
userEvent.type(
screen.getByPlaceholderText("What's your plan?"),
"do sth{enter}"
);
//then
const todos = screen.getAllByTestId("todo-item");
//then
expect(todos).toHaveLength(4);
});
检测 removeTodo(within,getByTestId 的使用)
removeTodo 的话呢 我们最好就是对默认的数据进行操作,因为如果我们需要先添加后操作的话其实是会有可能出错的

我们可以通过 remove-todo 这个 testid 去找到 remove
但是页面有三个默认的 item 我们要怎么去找到对应 item 的 remove 呢
这里就涉及到一个新的 api within 他能找到在这个对应元素内部的东西
那我们就需要根据默认 item 的名字加上 within 去找到里面的 testid 就可以了
within(screen.getByText("Learn about React")).getByTestId('remove-todo')
1
2
3
4
5
6
7
8
9
10
11test("should remove todo", () => {
//given
render(<App />);
//when
// 模拟用户输入
userEvent.click(
within(screen.getByText("Learn about React")).getByTestId('remove-todo')
);
//then
expect(screen.getAllByTestId("todo-item")).toHaveLength(2);
});
检测 toggleTodo
步骤是先找到第一个默认的 item
使用 within 找到其中的 Complete 按钮
模拟用户点击
期望该默认的 item 能给到 Redo 显示
1
2
3
4
5
6
7
8
9
10
11
12
13
test("should toggle todo", () => {
//given
render(<App />);
//when
// 根据名字找到第一个 item
const firstTodo = within(screen.getByText("Learn about React"));
// 模拟用户点击 Complete
userEvent.click(firstTodo.getByText("Complete"));
//then
// 期望第一个 item 中的 Redo 出现在 dom 中
expect(firstTodo.getByText("Redo")).toBeInTheDocument();
});
测试异步代码
如何测试异步代码呢
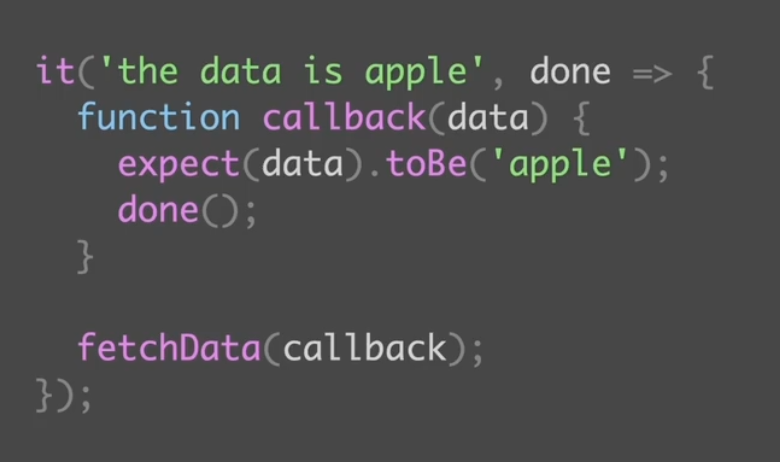
callback回调函数的方式
这种方式是使用了一个done方法来给函数一个断言 告诉jest这里是异步终止的地方
但是这个方法有一个缺点 就是大量异步回调的时候会产生类似于回调地狱的情况 并且违背了我们之前 given when then 的三段式写法Promise then
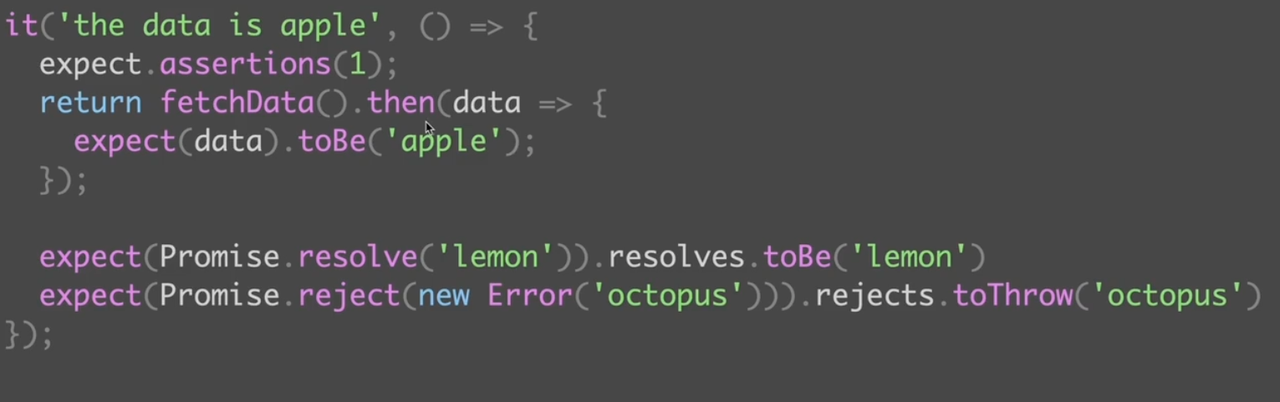
这种方式是使用了promise的then来进行异步结果的判断 但是代码显得很长 而且本质上就是把done换成了then,还是影响了我们对 given when then 的使用fetchData就相当于 when then 就相当于then
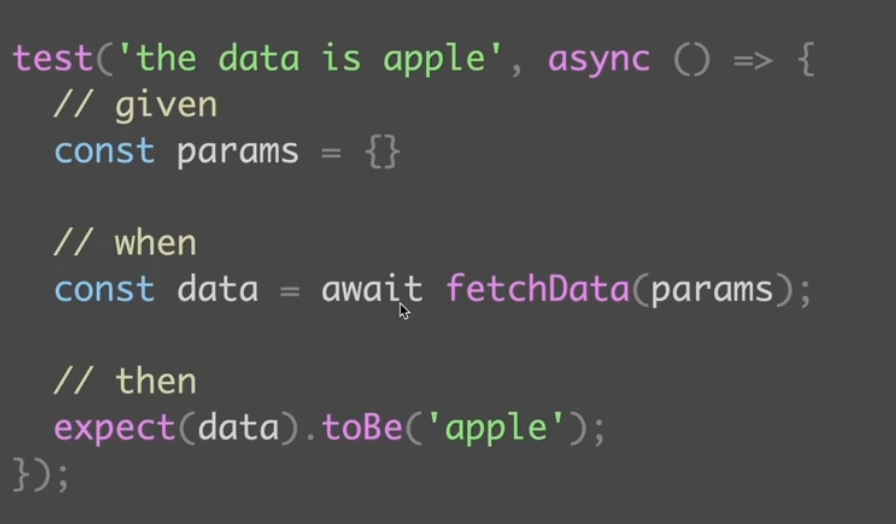
但我们也可以通过resolve和reject抽离出结果 单独对他们进行结果的测试async/await
这个await的好处就是符合 gwt 的原则 而且代码看上去比较好看最佳实践 MSW (mock service worker)
msw 可以在浏览器和 api 之间的 service worker 中拦截对应的请求安装
yarn add msw案例
app.tsx代码1
2
3
4
5
6
7
8
9
10
11
12
13
14
15
16
17
18
19
20
21
22
23
24
25
26
27
28
29
30
31import axios from 'axios';
import React, { useEffect, useState } from 'react';
import './App.css';
const url = 'https://randomuser.me/api';
function App() {
const [fullName,setFullName] = useState('')
const [loading,setLoading] = useState(false);
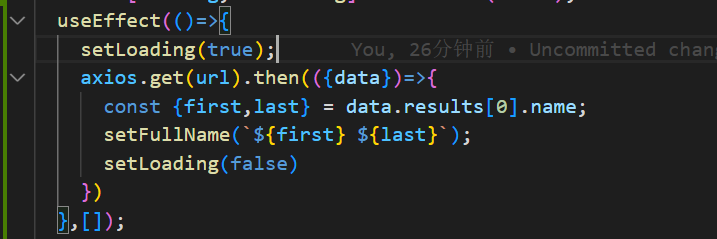
useEffect(()=>{
setLoading(true);
axios.get(url).then(({data})=>{
const {first,last} = data.results[0].name;
setFullName(`${first} ${last}`);
setLoading(false)
})
},[]);
if(loading){
return <div>Loading...</div>
}
return (
<div className="App">
<input type="text" placeholder={"Type your name"} value={fullName} onChange={(e)=>setFullName(e.target.value)}></input>
{/_ 要用 span 包起来 _/}
<p>my name is <span data-testid="full-name">{fullName}</span></p>
</div>
);
}
export default App;
拦截请求
我们看到 我们借助了这个网址去请求异步的数据渲染到我们页面对应的 input 框内
那我们编写测试代码的时候 就要去模拟这个请求
我们新建一个 Mock 文件夹 再新建一个 handlers.ts
引入 msw 的 rest 这个是他的一个模拟 api 相当于 axios 我们可以拦截这个地址 并把它最后的请求结果修改成我们想要的结果
他拥有一个 req 和 res 以及上下文 ctx 这点用法和 express 非常相似
这个 handlers 是一个数组 里面可以写很多拦截1
2
3
4
5
6
7
8
9
10
11
12
13
14
15
16
17
18
19import {rest} from 'msw';
export const handlers = [
rest.get("https://randomuser.me/api",(req,res,ctx)=>{
return res(
ctx.status(200),
ctx.json({
results:[{
name:{
title:'Mr',
first:'JOJO',
last:'ABC'
}
}]
})
)
})
]
建立服务器
我们有了拦截代码 还需要一个 node 服务器 继续新建一个 server.ts
引入我们的 handlers 因为他是一个数组 所以可以解构出来 直接使用在 setupServer 中1
2
3
4import {setupServer} from 'msw/node';
import { handlers } from './handlers';
// 设置一个服务器
export const server = setupServer(...handlers)
之后我们要在 setupTest.ts 里面去启动服务器的监听 告诉服务器什么时候开始准备拦截请求
jest 四个钩子 beforeAll beforeEach afterEach afterAll
这里有四个阶段 beforeAll beforeEach afterEach afterAll
分别代表全部测试开始前 单个测试开始前 单个测试结束后 全部测试结束后
我们对应要做的事情就是在全部测试开始前进行监视 在单个测试结束后重置我们的拦截 在全部测试结束后关闭 server1
2
3
4
5
6
7
8
9// jest-dom adds custom jest matchers for asserting on DOM nodes.
// allows you to do things like:
// expect(element).toHaveTextContent(/react/i)
// learn more: https://github.com/testing-library/jest-dom
import '@testing-library/jest-dom';
import { server } from './mock/server';
beforeAll(()=>server.listen())
afterEach(()=>server.resetHandlers())
afterAll(()=>server.close())
测试拦截的结果是否显示在 dom 中
我们刚刚写的 mock 结果是 JOJO ABC 所以 setFullName 会把他转为 JOJO ABC
我们现在就要利用 findByText 这个 api 去正则查找这几个单词是否在 screen 中
因为这个 api 是异步的 所以要加 async await1
2
3
4
5
6
7
8
9test("should display name from api directly",async()=>{
//given
render(<App/>)
//when
// 找到对应的名字 这个方法是异步方法 所以要 await
const text = await screen.findByText(/JOJO ABC/ig);
//then
expect(text).toBeInTheDocument();
})
异步修改了初始状态 测试异步后的结果
做完了上述的测试 发现我们原先的测试代码出错了,这个是因为我们的组件里面已经有了异步的 setState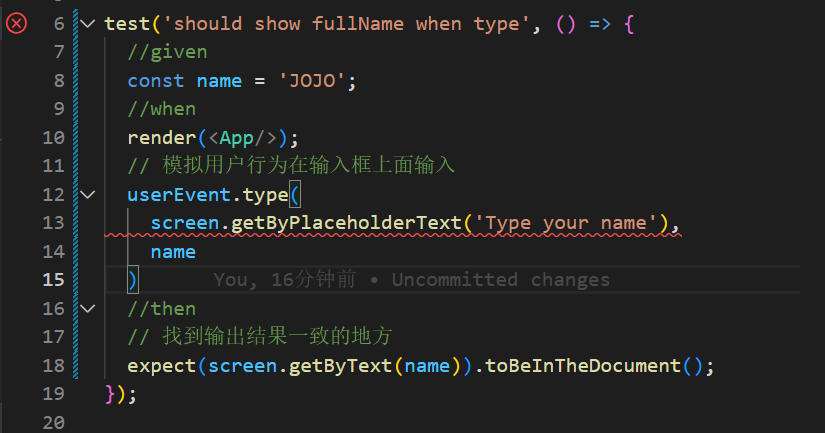
导致结果发生了变化 所以他找不到这个元素
所以我们要使用 findByPlaceholderText 并进行 await 来找到 input 框
并通过正则获取对应的测试结果1
2
3
4
5
6
7
8
9
10
11
12
13
14
15
16
17test('should show fullName when type', async() => {
//given
const appendText = 'Welcome';
//when
render(<App/>);
// 模拟用户行为在输入框上面输入 因为一开始在 setState 里面有异步的操作 所以找不到
// 要使用 findByPlaceholderText 并进行 await 来找到 input 框
const input = await screen.findByPlaceholderText('Type your name')
userEvent.type(
input,
appendText
)
//then
//由于我们一开始请求获取了一些人名 所以我们这里要用正则来找到对应的测试结果
expect(screen.getByText(/Welcome/i).textContent).toMatchInlineSnapshot(`"JOJO ABCWelcome"`);
});
让 msw 和开发环境共用一套 mock
我们发现我们在写 msw 的时候需要写一套 mock 但是我们在开发的时候也需要写一套 mock
这个时候 mock 能不能共用一套呢?
答案是可以的
先在 mock 文件夹下面编写一个 browser.ts1
2
3
4
5
6import { setupWorker } from "msw";
import { handlers } from "./handlers";
// 设置一个 worker
export const worker = setupWorker(...handlers);
我们发现和之前的 server 有异曲同工之妙,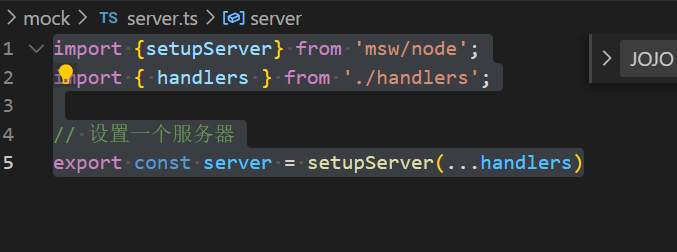
但是 server 是借用了 node 的 属于服务端的 我们这次用的是直接借助于浏览器的
然后在 app.tsx中添加以下代码1
2
3
4
5if(process.env.NODE_ENV === 'development'){
const {worker} = require('./mock/browser');
worker.start();
}
并配置 mswnpx init msw public/ --save
然后就会看到 public 下面多了个 mockServiceWorker.jspackagejson 里面多了1
2
3"msw": {
"workerDirectory": "public"
}
说明已经生成好了 运行项目 会发现请求的值一直是我们 mock 的值
所以开发也直接在 handlers.ts 里面去使用 mock 即可